Planning Change To Make Installing A Heat Pump Easier

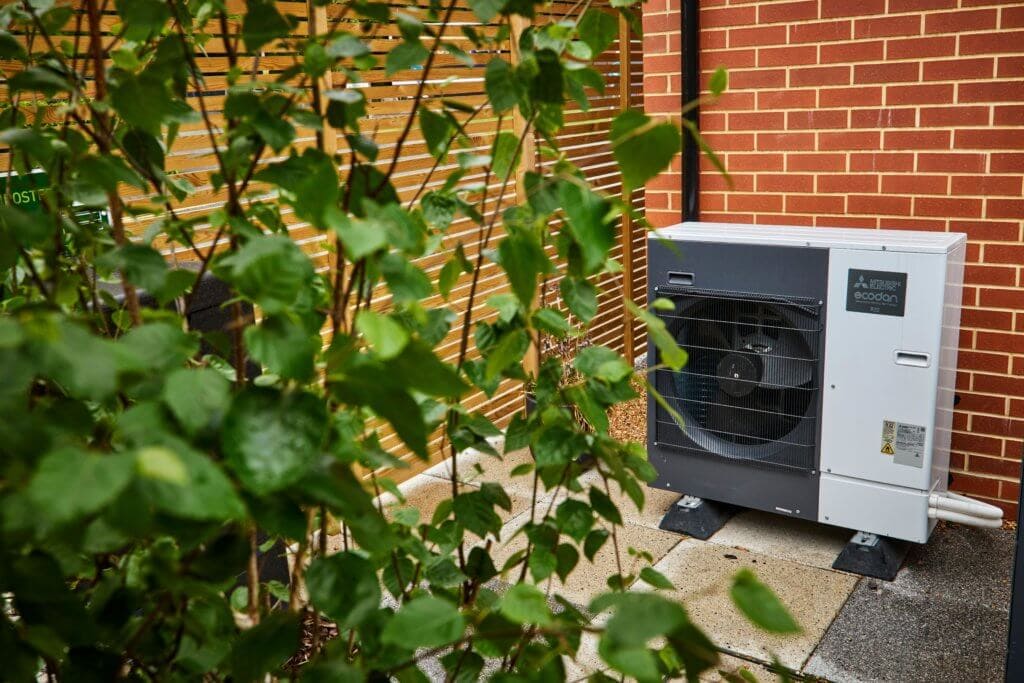
In May, major reforms under the government’s Warm Homes Plan removed a longstanding barrier: the requirement to apply for planning permission when installing heat pumps within one metre of a property boundary. Replacing a boiler is usually done when the previous boiler fails, so to have to wait for a planning approval is not something many have time for.  This move alone has slashed the percentage of installations needing approval from 30–40% down to just 5–10%.  

The legislation also now covers air-to-air systems, which offer both heating and cooling, granting them the same permitted development status as air-to-water systems.  The maximum allowable size of air-source heat pump units has also more than doubled, allowing more powerful and efficient systems to be installed without special permission.  Also, detached properties can now have up to two heat pumps installed under permitted development rights, which is ideal for larger properties or those wanting hybrid heating setups.

Whilst there have been several changes, noise limits remain in place, and modern installations must comply with updated guidelines, including a 42-decibel cap at the nearest neighbour’s window and adherence to MCS 020a standards. 

There are a number of measures being introduced in order for the uptake in heat pumps to become more widespread.  Under the Boiler Upgrade Scheme (BUS) households can access grants up to £7,500, with 0% VAT on eligible heat pump equipment until 2027.  There is a consultation taking place for a proposed £200 annual energy bill discount for heat pump users as part of the Warm Homes plan, and around 5,500 extra heat pump installers are being trained through government grants.

From 2027, the Future Homes Standard will effectively ban gas boilers in newly built homes. Instead, heat pumps and solar panels will become mandatory, reducing carbon emissions and saving homeowners around £530 annually.

Love them or hate them, we can see that there is a real drive to make heat pumps easier to install and they are certainly going to become common place in the not too distant future. 

It is important to consider if a heat pump is right for your property and whether you need to take other steps before installing a heat pump. Always start by increasing insulation in roofs, walls and floors where possible, reducing the energy demands. You should also consider how the heat pump might heat your home. Often standard radiators associated with a gas or oil boiler are not suitable and may need to be changed to larger ones to run at a lower temperature.

It’s never quite as simple as replacing a gas boiler with a heat pump and it’s important to get professional advice from someone impartial. Take a look at the Energy Saving Trust website for further guidance.

Managing Budgets on a Self-Build Home: Avoiding Nasty Surprises

For many aspiring homeowners in the UK, building a home from the ground up is the ultimate dream. Whether it’s a contemporary eco-home in the countryside or a modest family house on the edge of a town, self-building offers a unique opportunity to create a space that reflects your needs, values, and aspirations.

But that dream often comes with a stark financial reality. Managing the budget of a self-build project can be one of the most difficult aspects, and mistakes made early on can have lasting consequences. While the idea of saving money by managing the process yourself may be appealing, the truth is that poor planning, underestimating costs, or overlooking hidden expenses can quickly put your entire project at risk.

So how do you keep your self-build project on budget? What are the common pitfalls, and who can help you navigate the financial complexities? Our quick notes explore the key considerations, challenges, and expert advice that every self-builder should understand before breaking ground.

This is not intended to replace formal paid for advice, but is simply to give you an overview to better inform you when making your first steps towards your bespoke home.

The Appeal and the Challenge

The UK’s self-build market continues to grow, encouraged by planning reforms and greater awareness of custom homebuilding. Shows like Grand Designs have popularised the notion of creating a bespoke dream home, often on a tight budget and against the odds. But behind the TV edits lies a complex reality.

A self-build project requires the homeowner to step into multiple roles: client, project manager, employer, and sometimes even contractor. With those roles come responsibilities, and one of the most important is financial control.

According to the National Custom and Self Build Association (NaCSBA), budget overruns are one of the most common issues reported by self-builders. In some cases, costs exceed initial estimates by 20% or more. This isn’t necessarily because of extravagant spending, but often due to hidden costs, changing circumstances, or simply poor planning.

Setting a Realistic Budget

The first step in managing your budget is knowing how much you can afford to spend – not just on the house itself, but on the entire process. A realistic self-build budget needs to account for far more than bricks and mortar.

Typical Budget Breakdown

Here’s a rough guide to how your overall budget might be divided:

  • Land purchase and legal costs: 25–35%
  • Construction costs: 40–50%
  • Professional fees: 10–15%
  • Contingency: 10–15%
  • Fittings and finishes: 5–10%
  • External works (landscaping, access): 5–10%

A common mistake is to focus solely on the build cost — the cost of constructing the house shell – while forgetting about everything else. That oversight can cause problems later on when funds begin to run low.

The Role of Professional Cost Advice

No matter the size of your self-build project, expert advice is worth its weight in gold – particularly when it comes to cost.

A Quantity Surveyor (QS) provides detailed cost planning and financial control throughout a project. This includes:

  • Initial cost planning based on early design ideas
  • Benchmarking against similar projects
  • Preparing detailed estimates and bills of quantities
  • Evaluating tenders and negotiating with contractors
  • Monitoring costs during construction
  • Valuing interim payments and change orders

For larger or more complex projects, a QS can prevent costly overruns, identify value engineering opportunities, and offer peace of mind. While not every self-builder chooses to use one, doing so can be a wise decision, particularly if you are new to construction.

Your architect can help with some of this, and typically will work with the QS.

The Hidden Costs You May Not See Coming

Many self-builders underestimate the full range of costs involved in creating a home from scratch. Some expenses are obvious – materials, labour, planning – but others are less visible, particularly in the early stages.

1. Site Preparation

Even before foundations are dug, your site may need extensive work:

  • Site clearance and vegetation removal
  • Demolition of existing structures
  • Tree surgery or removal
  • Archaeological surveys (a requirement on some sites)
  • Ground investigation and soil testing
  • Remediation of contamination
  • Retaining walls or level changes

These can add significant cost, especially if the site has poor access or lies on sloping ground.

2. Professional and Regulatory Costs

You’ll need a team of professionals beyond your architect or designer:

  • Structural engineer
  • Planning consultant (for difficult applications)
  • Energy consultant (for SAP and EPC ratings)
  • Party wall surveyor (if applicable)
  • Building regulations inspector (private or local authority)
  • Warranty provider (e.g., NHBC, Premier Guarantee) – This may not be needed.

Each comes with fees, often invoiced in stages. Budgeting for all consultant input, not just the design is essential.

3. Utility Connections

Bringing power, water, and sewerage to your new home is rarely straightforward. Depending on site location, you may face:

  • New connections and meter installations
  • Service trenching
  • Installation of a private drainage system (e.g. treatment plant)
  • Water pressure upgrades
  • Connection charges from utility providers

In remote or rural areas, costs can run into thousands — particularly where infrastructure upgrades are needed.

4. Insurance and Finance

Self-builders typically need specialist insurance to cover:

  • Site works and materials
  • Public liability
  • Employers’ liability (if hiring labour directly)
  • Contract works and plant insurance

If you’re financing the project through a self-build mortgage, there may also be arrangement fees, valuation fees, and staged drawdown requirements, all of which need to be factored in.

Why a Contingency Is Essential

Even the best-laid plans can go awry. Weather delays, material shortages, planning revisions, or simply changing your mind mid-build can all add unexpected costs.

That’s why experts recommend including a contingency of 10–15% of your total construction budget. For example, if your build cost is projected at £250,000, you should ideally hold back £25,000–£37,500 as a reserve.

When Might You Need It?

  • Unexpected ground conditions (e.g. rock, soft soil, flooding)
  • Redesigns following planning feedback
  • Discovery of protected species (bats, newts, etc.)
  • Supply chain delays or inflation
  • Specification changes or quality upgrades
  • Mistakes or remedial works

Importantly, your contingency should not be used as a buffer to upgrade your kitchen or add a fancier cladding. Reserve it for true unknowns.

Keeping Costs Under Control During Construction

Once the build begins, the pressure increases — and so does the risk of budget creep. Here are some practical steps to stay in control:

1. Use a Detailed Budget Tracker

Maintain a live spreadsheet or software tracker with separate lines for:

  • Site acquisition
  • Professional fees
  • Construction costs (itemised by trade or stage)
  • Fittings and finishes
  • External works
  • Contingency and variations
  • VAT

Regularly update the actual spend versus the planned to spot overruns early.

2. Stick to the Specification

The temptation to upgrade materials or tweak the design mid-build is strong, especially when you’re physically on-site and imagining the finished space. But changes are costly. Even seemingly minor alterations can have cascading effects.

Set a clear specification early and stick to it wherever possible.

3. Choose Fixed-Price Contracts Where Possible

If working with contractors, try to secure fixed-price contracts for defined scopes of work. This gives more cost certainty than day rates or provisional sums.

Be aware, though, that fixed prices rely on fixed designs. Vague drawings or incomplete details leave room for disputes or added costs.

4. Phase Non-Essential Works

If the budget becomes tight, some items, such as landscaping, garage builds, or internal joinery can be postponed. Focus on completing the habitable part of the house to a high standard first.

Planning for VAT

Most new self-build homes are zero-rated for VAT on labour and materials – a substantial saving. However, VAT rules are strict and can be complex. You’ll need to:

  • Keep all invoices and evidence
  • Submit a reclaim through HMRC after project completion
  • Ensure that contractors understand VAT exemptions

Note that professional fees and some services are not VAT-exempt. Always seek specialist advice.

Budgeting with Self-Build Software and Apps

A growing number of tools are available to help self-builders plan and manage their finances, from downloadable spreadsheets to dedicated apps. Many include pre-loaded cost templates, reminders for staged payments, and live tracking of actual spend.

These tools can be particularly useful for those without construction experience, helping you to stay organised and avoid missing key payments or costs.

Final Thoughts: Budgeting is More than Numbers

Managing a self-build budget is as much about mindset as it is mathematics. It requires discipline, transparency, planning, and above all realism.

The key takeaways?

  • Don’t underestimate costs – especially non-construction costs
  • Seek professional help when needed, especially for cost planning
  • Allow for the unexpected with a realistic contingency
  • Monitor everything and question every extra
  • Prioritise essentials and avoid scope creep during the build

Building your own home can be one of life’s most fulfilling experiences – but only if it’s also financially viable. With thorough preparation and careful management, your self-build journey can remain firmly on budget, and on track.

We’d love to talk to you about your project. Please do contact us and start your journey today.

The Benefits of Timber Frames

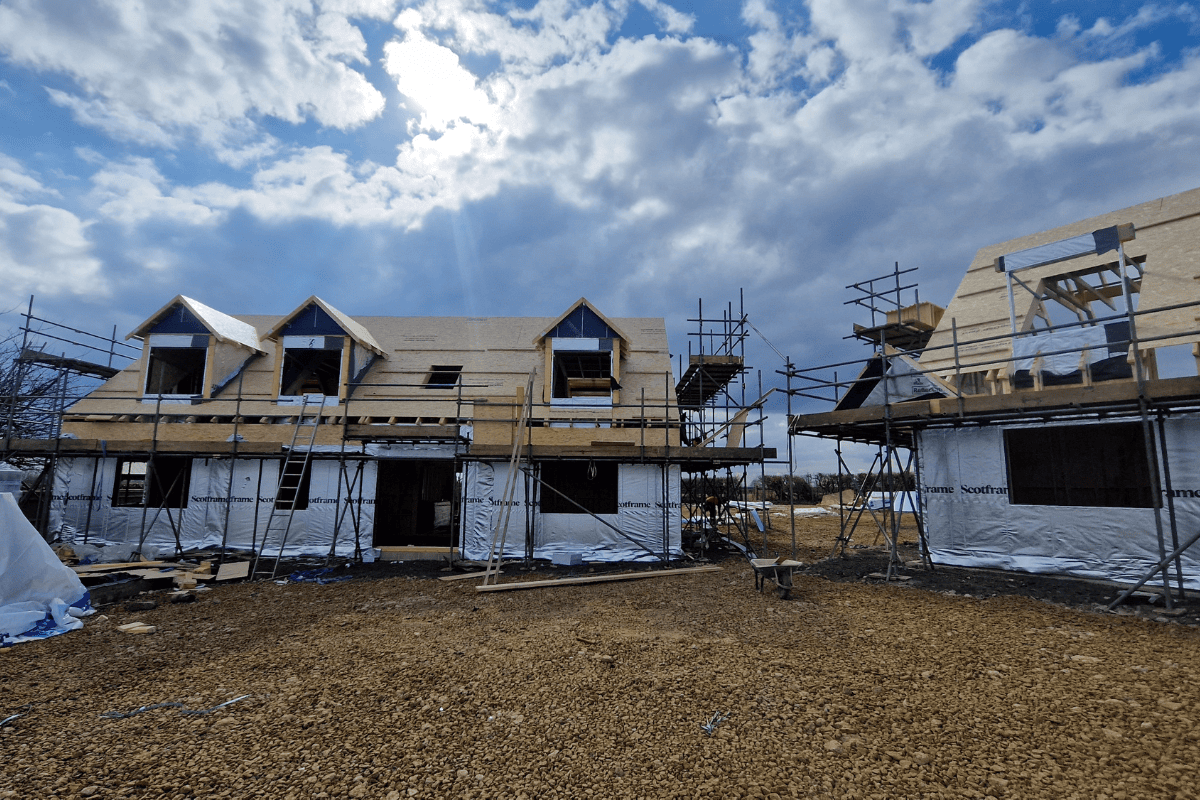
Recently, one of our Directors, Darren, enjoyed a really interesting site visit to look at the progress of EW Estates development in Little Bourton near Banbury. The reason behind the visit was to look in detail at the Scotframe timber frame solution. Incredibly neat, tidy and super efficient – this is a great way to de-risk projects and to achieve a higher quality build in much shorter timescales, with high performance fabric and fantastic levels of air tightness. There are so many benefits, do contact us to find out if timber frame could work for your next project. 

A Guide to Your Self-Build Home

Building your own home is an exciting and rewarding process, offering the chance to create a space tailored to your needs and lifestyle. However, “self-build” doesn’t necessarily mean physically constructing the house yourself. Instead, it involves managing the process, making key decisions, and employing professionals and contractors to carry out the work. One of the biggest advantages of self-build is the ability to design a home that suits your specific requirements, both in terms of aesthetics and functionality. Additionally, you have full control over the energy performance of your home, allowing you to create a low-energy, low-carbon building that is cost-effective to run. This guide walks you through each stage of the process, from feasibility to completion, outlining critical approval processes and timescales to help you navigate your self-build project successfully.

Please bear in mind this is not professional advice, and we would always advise you speak with a suitably qualified person before setting out on this journey

Stage 1: Feasibility and Planning (3-6 months)

Before you begin, it’s important to assess whether your self-build project is viable. Key considerations at this stage include:

  • Finding a Suitable Plot: Identify and secure land with appropriate planning permission or potential for approval. Land searches and planning history reviews are essential. You may wish to engage a land agent, and architect or planning consultant to assist with this process.
  • Budgeting and Finance: Establish how much you can afford and explore funding options such as self-build mortgages. A financial advisor with experience in self-build projects can help you explore borrowing options and budget planning.
  • Design Feasibility: Engage an architect or designer to create initial concept sketches and assess site constraints, such as ground conditions, access, and services. If the site has challenging terrain or poor ground conditions, a structural engineer may need to be consulted early on.
  • Pre-application Advice: Consult with the local planning authority to discuss your proposal and identify any planning challenges early on. An architect or planning consultant can be invaluable in navigating complex planning policies and ensuring your application has the best chance of success.

Stage 2: Planning Permission & Design Development (3-6 months)

Once feasibility is confirmed, you need to submit a planning application. Your architect or planning consultant will assist in preparing and submitting the necessary documents.

  • Detailed Design & Drawings: Your architect will develop designs, ensuring compliance with local policies and regulations. This stage is an opportunity to refine the layout, aesthetics, and energy efficiency measures, ensuring the home meets your personal preferences and long-term sustainability goals. You can work with an architect and/or energy consultant to optimise insulation, airtightness, and heating systems to achieve a low-energy home.
  • Planning Application Submission: A standard planning application takes approximately 8-13 weeks for a decision.
  • Consultation Process: Local authorities will consult with neighbours, highways, and other relevant bodies.
  • Planning Conditions: Approval may be subject to conditions requiring additional information before work begins.

Key Approvals:

  • Full Planning Permission: Required for most new dwellings unless permitted development rights apply.
  • Listed Building Consent: If applicable, for sites involving historic structures.

Stage 3: Technical Design & Building Regulations Approval (2-4 months)

With planning permission secured, the next step is obtaining Building Regulations approval to ensure compliance with safety, energy efficiency, and accessibility standards.

  • Technical Drawings & Structural Calculations: Developed by your architect and structural engineer. A sustainability consultant can be engaged at this stage to enhance the energy performance of the building.
  • Building Regulations Application: Submitted to either the local authority or an approved inspector.
  • Party Wall Agreements: If your project affects shared boundaries, you may need to serve notice under the Party Wall Act 1996. A party wall surveyor can handle this process.
  • CDM Regulations & Principal Designer Role: Under the Construction (Design and Management) Regulations 2015 (CDM 2015), a Principal Designer must be appointed to oversee health and safety during the pre-construction phase.
  • Energy Efficiency Considerations: This stage provides an opportunity to enhance the sustainability of your home by incorporating high-performance insulation, renewable energy sources, and energy-efficient heating systems, helping to reduce carbon emissions and running costs.

Key Approvals:

  • Building Regulations Approval: To be obtained via a Full Plans Application
  • Structural Warranty: Required by most lenders and obtained through providers like NHBC, LABC Warranty, or similar.

Stage 4: Pre-Construction & Procurement (2-4 months)

Before breaking ground, you must finalise contracts and appoint a construction team. This stage involves:

  • Choosing a Construction Route: Options include hiring a main contractor, managing subcontractors yourself, or using a package home provider.
  • Tendering & Contractor Selection: Obtain quotes and select your preferred contractor(s) based on cost, experience, and references.
  • Contracts & Insurance: Establish clear contractual agreements and ensure adequate self-build insurance and site liability coverage. 
  • Utilities & Services Arrangements: Plan connections for water, electricity, drainage, and broadband.
  • Health & Safety: Under CDM 2015, a Principal Contractor must be appointed to manage site safety during construction.

Key Approvals:

  • Construction Contract: Formal agreement with a contractor to outline scope, costs, and timelines.
  • CDM Notification: For projects exceeding 30 working days or 500 person-days, a notification must be submitted to the Health and Safety Executive.

Stage 5: Construction (6-18 months)

This is the most intensive phase, requiring effective management to keep the project on schedule and within budget. The main stages include:

  • Groundworks & Foundations: Site preparation, excavation, and foundation pouring. A geotechnical engineer may be needed for complex ground conditions.
  • Superstructure: Construction of the walls, floors, and roof.
  • First Fix: Installation of plumbing, electrics, heating, and internal structural elements.
  • Weatherproofing: Ensuring the building is watertight with roofing, windows, and doors installed.
  • Second Fix: Finishing touches, including plastering, internal joinery, tiling, and final electrics.
  • Final Finishes: Painting, flooring, kitchens, and bathrooms.
  • Sustainability Measures: By incorporating energy-efficient building materials, solar panels, and heat recovery systems, you can significantly lower your home’s carbon footprint and future energy costs.

Regular site inspections will be required to ensure compliance with Building Regulations, particularly at key stages such as foundation completion, structural framework, and final completion.

Key Approvals:

  • Building Control Inspections: Carried out by your local authority or approved inspector.

Stage 6: Completion & Handover (1-2 months)

As construction nears completion, a series of final approvals and certifications must be secured.

  • Snagging & Defect Rectification: Identify and rectify minor issues before sign-off.
  • Final Building Control Inspection: Ensures all work meets regulations before a completion certificate is issued.
  • Energy Performance Certificate (EPC): Required for all new homes before they can be occupied.
  • Final Utility Connections: Ensure all services are fully operational.
  • Handover & Moving In: Once approvals are complete, you can officially move into your new home.

Key Approvals:

  • Building Control Completion Certificate: Confirms compliance with regulations.
  • Structural Warranty Certificate: Required for mortgage purposes and long-term protection.

A self-build project is a complex but immensely rewarding undertaking. Understanding each stage—from feasibility to completion—will help you stay on track, meet legal requirements, and ultimately achieve a high-quality home tailored to your vision. By designing a home that meets your exact needs and incorporating energy-efficient features, you can create a comfortable, low-carbon, and cost-effective house to run. Surrounding yourself with the right professionals, including an architect, structural engineer, sustainability consultant, and contractors, will ensure a smoother process. By planning carefully and keeping on top of approvals, you’ll be well on your way to enjoying your dream home. We would love to talk to you about becoming part of the process to turn your dream into reality. You can get in touch here.

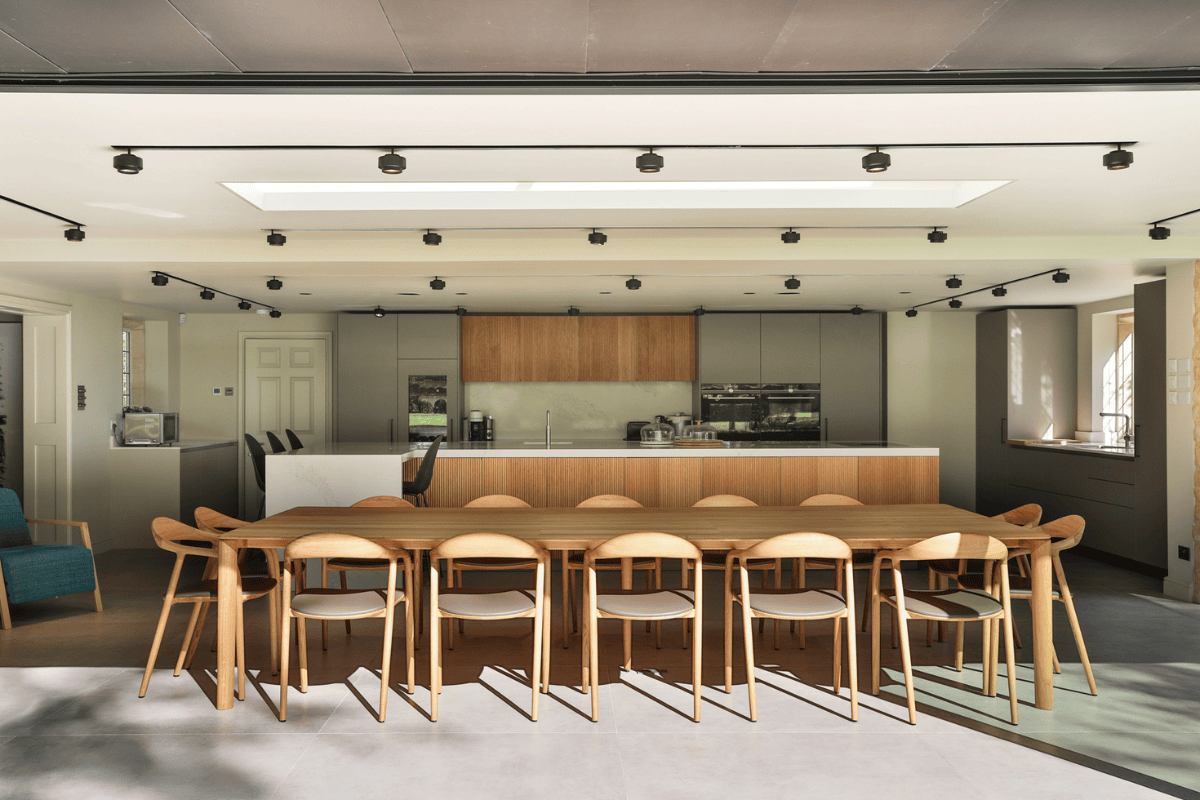
Stunning Cotswold Kitchen

Modern minimalist lines meets traditional Cotswolds country house in this recently completed project. The house was significantly remodelled and enlarged with a new sleek zinc and glass extension. The combination of sharp, elegant geometric lines contrasts beautifully with soft limestone walling and traditional detailing of the existing house, and the fantastic kitchen by Kitchen Architecture fits perfectly with the overall aesthetic.

We will feature a full case study on our website shortly, showcasing more of the stunning photography by Claire Williams

Why is Choosing the Correct Orientation for your Building so Important?

When designing a building, one of the most crucial factors influencing energy efficiency is the site orientation. This refers to the positioning of a building in relation to the sun, wind, and surrounding environment. It determines how the building interacts with natural elements, which influences its energy performance throughout the year. Careful consideration should be given to each particular site. Factors such as local climate, topography, and surrounding buildings can impact the amount of solar exposure and wind patterns.

Low energy buildings can be achieved with many different orientations, however it is much easier if the building is positioned optimally on the site. Proper orientation can significantly reduce heating and cooling demands, enhance natural lighting, improve overall comfort, and reduce the reliance on artificial energy sources.

What is the best orientation for my building?
The ideal orientation (in northern hemisphere countries) is for the principal facade of the building to face 180 degrees due south. This is to make use of the solar energy during the heating season and maximise the use of the south facade. In winter the amount of heat required will be at its highest and the south facade will have the most opportunity to absorb solar radiation. Maximizing solar gain can significantly reduce heating costs. South-facing windows receive the most sunlight and large windows on this facade can let in heat during the day. Also, to avoid excessive heat loss, the building should have minimal openings on north-facing walls, as these receive little direct sunlight and are prone to heat loss.

It is also important to consider summer comfort. Minimising heat gain is essential in the summer to keep indoor spaces cool. Orienting a building with its longer sides facing north and south reduces direct sun exposure on east and west facades, which receive intense sunlight during morning and afternoon hours. Large east or west facing windows in particular can have a significant impact in terms of overheating and sun shading is essential for these orientations. South facing windows will generally also require some shading to ensure comfortable summer conditions. Shading devices such as overhangs, brise-soleil, pergolas, and nearby trees can block excessive solar heat gains.

Site orientation also plays a critical role in natural cooling. Buildings should be oriented to take advantage of prevailing winds, which can be channelled through openings to create cross-ventilation. Windows and vents placed strategically across opposite sides of a building allow for air movement, reducing the need for mechanical cooling.

Good orientation can also enhance natural lighting, reducing the reliance on artificial lighting during the day.

What if I can’t position my building optimally?
There may be situations where it is not possible to position a building optimally due to existing site constraints, or because it does not make the most of views and other site features. A low energy building can still be achieved but, for example, the fenestration may need to be designed differently or the building may need to have a more compact form. The Building Research Establishment states that a poor orientation can increase annual heating by at least a third. The most important thing to recognise is the optimum position is due south, and have a rational argument for any deviation.

By understanding and applying site orientation principles, architects can create energy-efficient buildings that enhance comfort while reducing environmental impact. Thoughtful planning at the outset of a project can lead to significant long-term savings and sustainability benefits.

Thinking Buildings are passionate about low energy building design and we also have our own certified Passivhaus designer. Please get in contact if you would like to know more or have any further questions.

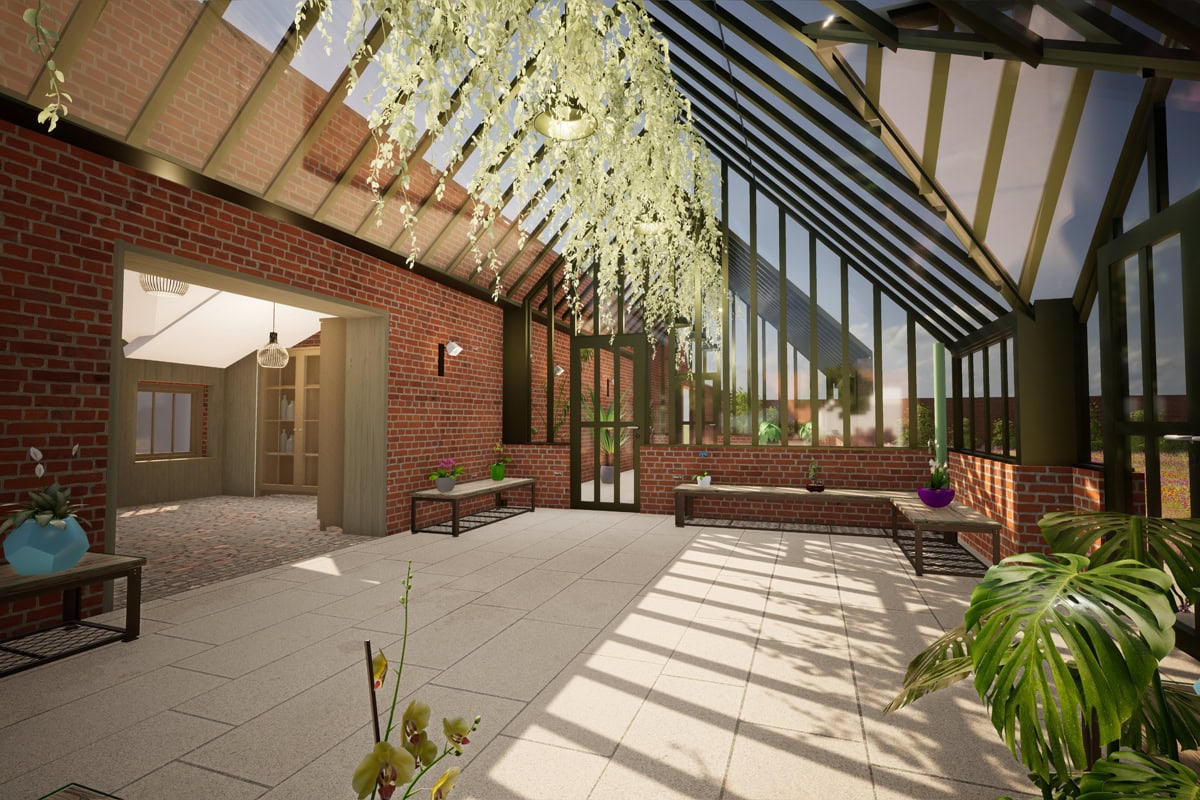
Cotswold Kitchen Garden

This is an usual scheme for a private client in the Cotswolds. The client was lucky enough to have a Victorian walled garden on their land, and this scheme was developed to make the most of that asset.

On the inner side of the walled garden, an extensive greenhouse was planned, to support the food production in the external parts of the garden, but also to be used as an occasional dining space. On the other side of the wall, the existing lean-to shed was to be converted to support both the fruit and vegetables grown in the garden and in dining use, including a kitchen and lobby, with storage units for preserves, pickles, and ferments produced there.

We love how the resulting scheme is a beautiful balance of indoor and outdoor living, which really made the most of the existing landscape and gardens.

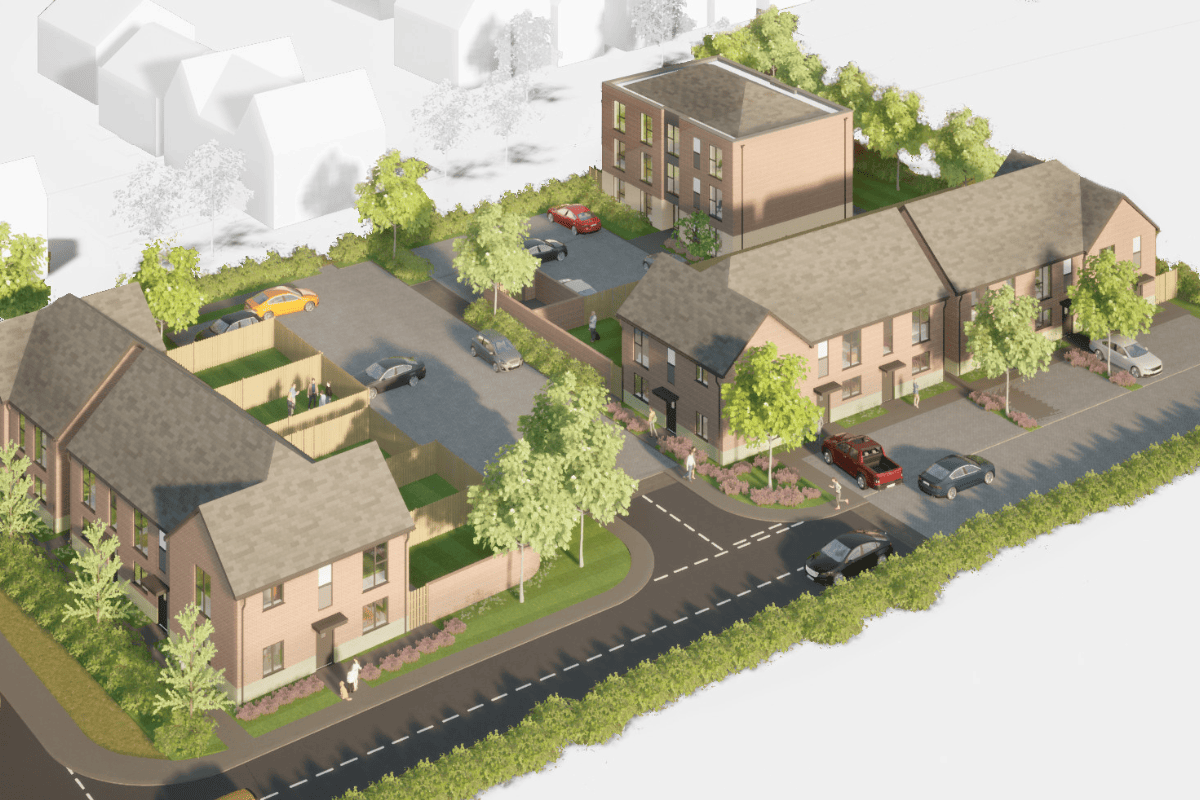
Planning Applications In Areas With Housing Shortfalls

Thinking Buildings have recently been commissioned to assist with developing a planning application for a residential site which is outside, but on the edge of, a village settlement boundary. Ordinarily, this would be sufficient to deter most from submitting an application, but with increasing pressure to build more houses, the balance is tilting in favour of development.

For developers, landowners, and self-builders, submitting a planning application in an area where the local authority is failing to meet its housing targets can present a unique opportunity. The UK’s planning system places a statutory duty on councils to demonstrate a five-year housing land supply. If they cannot, national planning policy tilts the balance in favour of sustainable development, significantly increasing the chances of gaining planning permission.

The National Planning Policy Framework (NPPF) states that if a local authority cannot demonstrate a five-year supply of deliverable housing land, the “presumption in favour of sustainable development” applies. This means that planning applications for new housing should generally be approved unless the adverse impacts of the proposal significantly and demonstrably outweigh the benefits.

This policy shift is crucial because it weakens a council’s ability to reject applications based on restrictive local policies alone. Instead, decision-makers must assess proposals against the broader objectives of national planning policy, which prioritises boosting housing supply.

In areas with a housing shortfall, councils may be forced to consider development on sites not previously earmarked in their Local Plan. This provides opportunities for landowners and developers to bring forward well-designed, sustainable proposals in locations that might have previously faced resistance.

This is particularly relevant for edge-of-settlement sites, brownfield land, and infill plots, which may become more viable when councils struggle to meet targets. Additionally, rural exception sites – small developments on the edges of villages – may stand a better chance of approval if they contribute to addressing the housing shortfall.

When a local authority is under pressure to boost housing supply, planners may be more inclined to work proactively with applicants to approve sustainable developments. Councils want to avoid costly and time-consuming appeals, particularly if they are likely to lose due to a lack of housing supply.

If an application is refused, the absence of a five-year housing supply can significantly strengthen an applicant’s case at appeal. Planning inspectors will consider whether the council has a demonstrable housing shortfall, and if so, the presumption in favour of sustainable development will weigh heavily in the applicant’s favour. Many appeals in such circumstances result in approvals, further encouraging developers to submit applications.

While the policy creates opportunities for developers, it also benefits local communities by helping to address housing shortages, improve affordability, and support economic growth. Thoughtfully designed schemes that incorporate sustainability measures, good design principles, and appropriate infrastructure contributions are more likely to gain support from both planners and local stakeholders.

Submitting a planning application in an area where the local authority is failing to meet its housing targets can be a strategic move. With the presumption in favour of sustainable development, greater flexibility in site selection, and increased chances of appeal success, developers and landowners can take advantage of a planning system that actively seeks to address the UK’s housing crisis.

Do reach out if you’d like to know more or have a potential site. We offer free initial assessments, you can arrange to talk to us here.

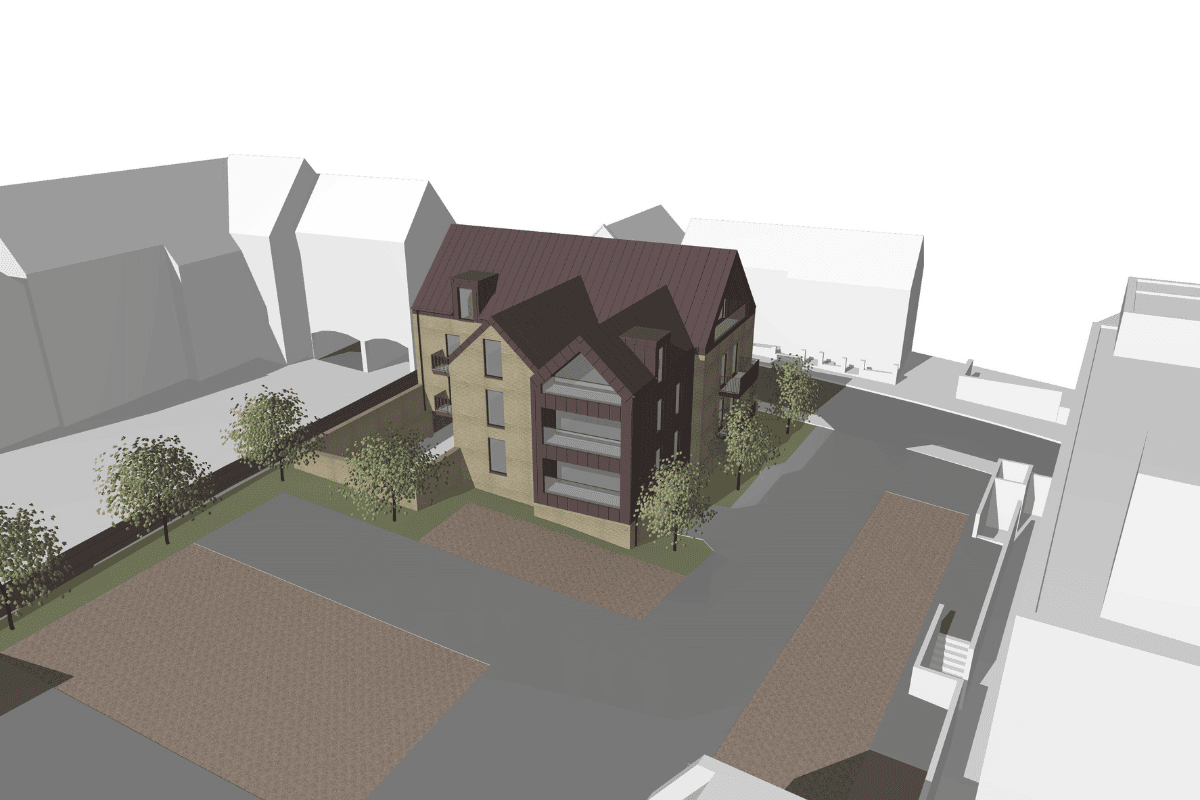
Town Centre Development

This week we share a nice design concept emerging for a new town centre development that involves master-planning an existing commercial site. The scheme is being developed with Alcema and includes 8 new apartments with undercroft parking on a sloping site. 

The scheme uses the site’s sloping levels to accommodate the semi basement car park, with the architecture defined by the use of pitched roofs and traditional brick tones that are evident in the surrounding conservation area. The design twist and architectural contrast is provided by the bronze coloured standing seam roof and wall cladding, sharp roof dormers, and contained balconies. 

This project is a continuation of our increased workload in designing town centre mixed use development. 

Stunning Cotswold Home

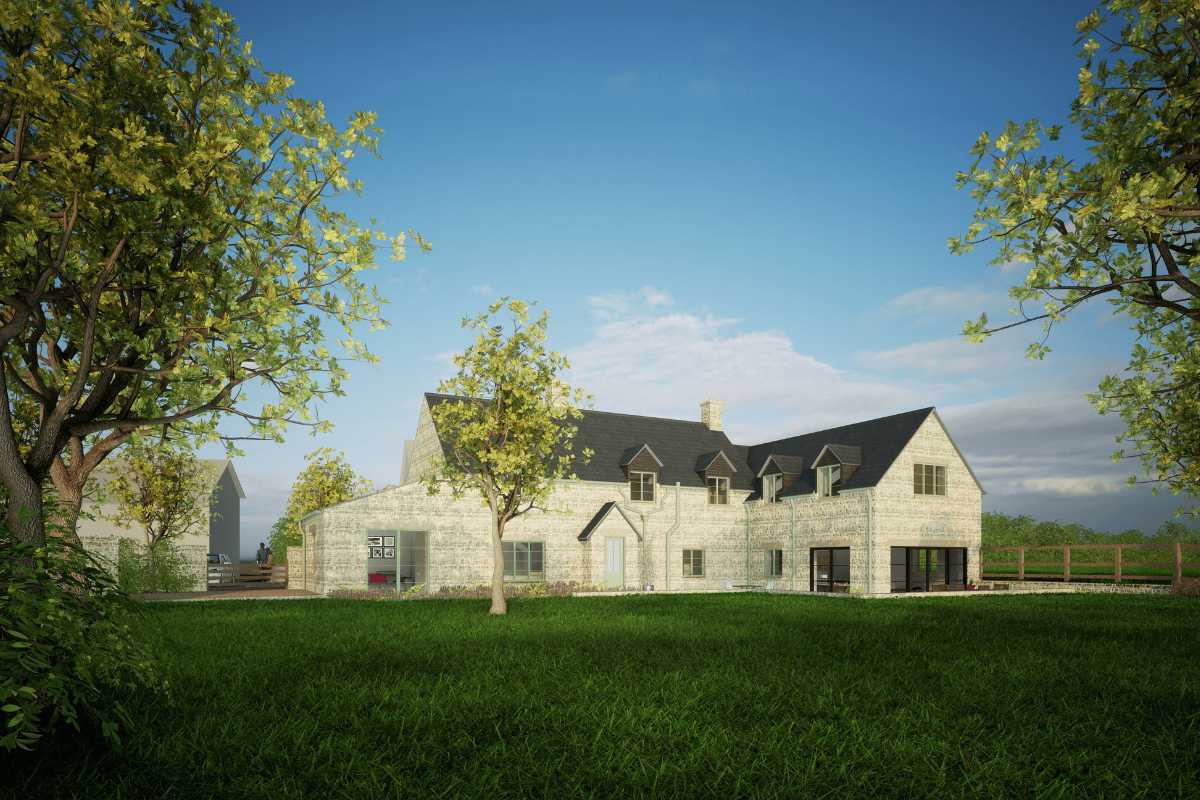
This substantial home improvement project is progressing well on site and we will soon share some photos of the construction works. The project involves a full renovation and 2 storey side and rear extensions to a cottage in the Cotswolds, to form a beautiful family home for our clients. A 3 bay oak framed car port and home office is also being added to the site, along with a wider landscaping scheme. 

This beautiful project is a continuation of our portfolio of high end, luxury, houses and homes. You can find out more about our range of residential projects here on our website.