
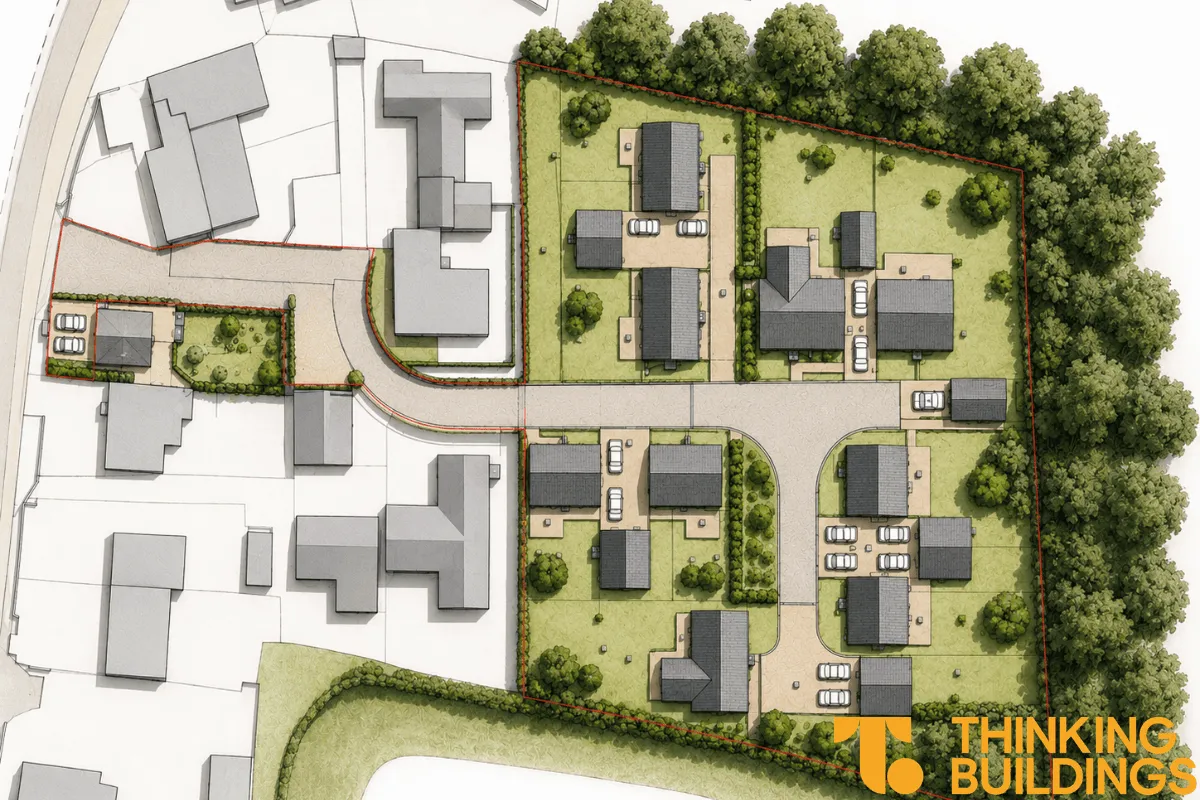
Thinking Buildings has submitted an outline planning application for up to nine new homes on land in Matlock, Derbyshire. The site sits adjacent to a Conservation Area and close to a number of listed buildings, making the project more sensitive than a typical residential scheme.
A major part of the work has focused on understanding the historic setting of the site and ensuring the proposals respond appropriately to the character of Old Matlock. Extensive heritage assessment work has been undertaken alongside detailed analysis of the surrounding townscape, landscape and historic development pattern. The proposed approach takes influence from the local vernacular through the use of natural materials, traditional proportions and a layout designed to sit comfortably within its surroundings.
Access and highways have also been key considerations throughout the design process. The existing entrance from Church Street has been carefully reviewed and redesigned to improve visibility, vehicle movement and pedestrian safety for both the proposed development and existing residents. Detailed highways reports, vehicle tracking and speed surveys have all been carried out to help demonstrate that the site can be accessed and serviced safely.
Alongside this, the application has been supported by ecology, biodiversity, drainage and flood risk assessments. Existing mature hedgerows and boundary planting are proposed to be retained wherever possible, helping maintain the contained and semi-rural feel of the site while also enhancing biodiversity. Sustainable drainage proposals have also been developed to respond to local ground conditions and ensure there is no increased flood risk elsewhere.
The application brings together a wide range of technical and design work to create what we believe is a well considered and balanced proposal for a sensitive site within Matlock.
Category: Technical
New Roofs and New Relationships At Millgate School, Leicester
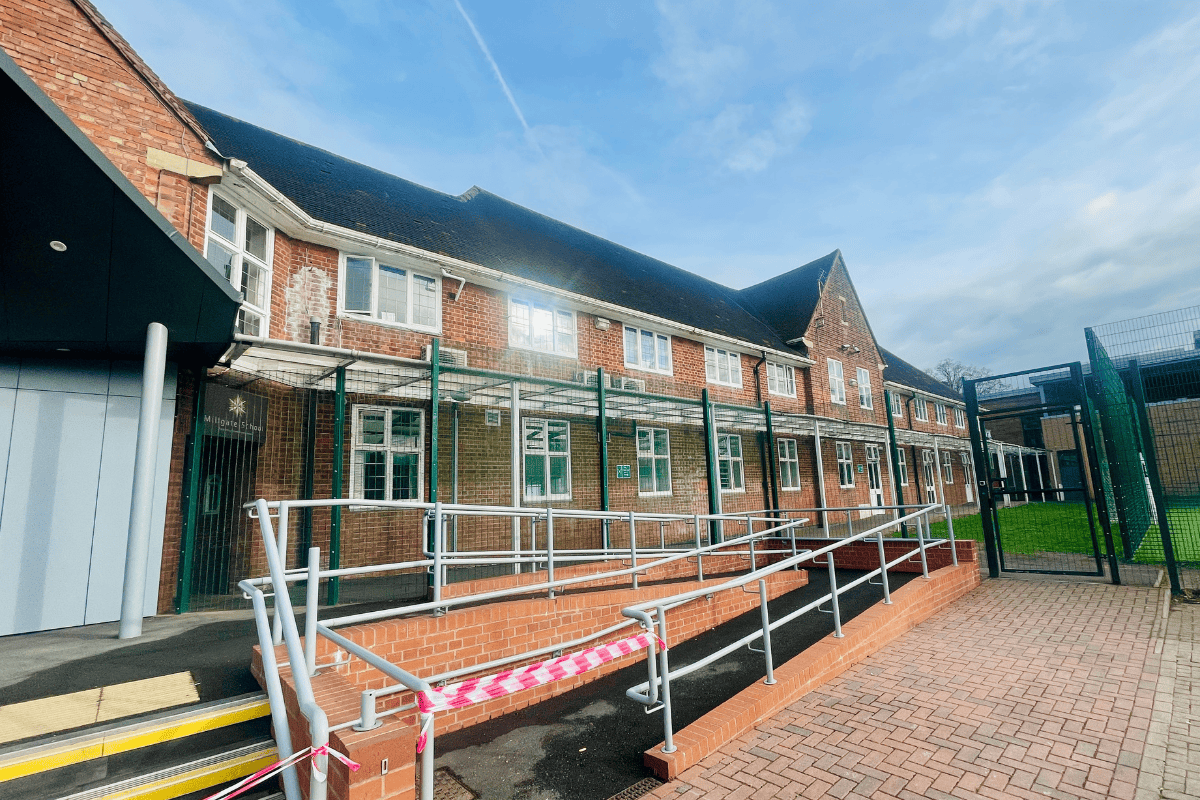
Earlier this year, Thinking Buildings were appointed to support Millgate School with a series of improvement projects. The most significant of these is a re-roofing scheme, prompted by the existing roof falling into disrepair. The works will see a full replacement with a new clay tile roof, designed with traditional detailing to respect the building’s character, alongside a new flat roof to modern standards.
We’ve been appointed to deliver architectural design, building regulations principal designer (PD) duties and Construction (Design and Management) (CDM) principal designer services. Alongside the main works, we also provided support in our CDM PD capacity for the safe removal of asbestos and the installation of new air source heat pumps, helping to future-proof the school’s energy use.
This project also marks the start of a new working relationship with Addison Hunt, who are providing project management and quantity surveying services. We’ve also been pleased to work with new clients Discovery Trust, and hope this is the first of many opportunities to support them in improving and developing their schools.
A Guide to Your Self-Build Home
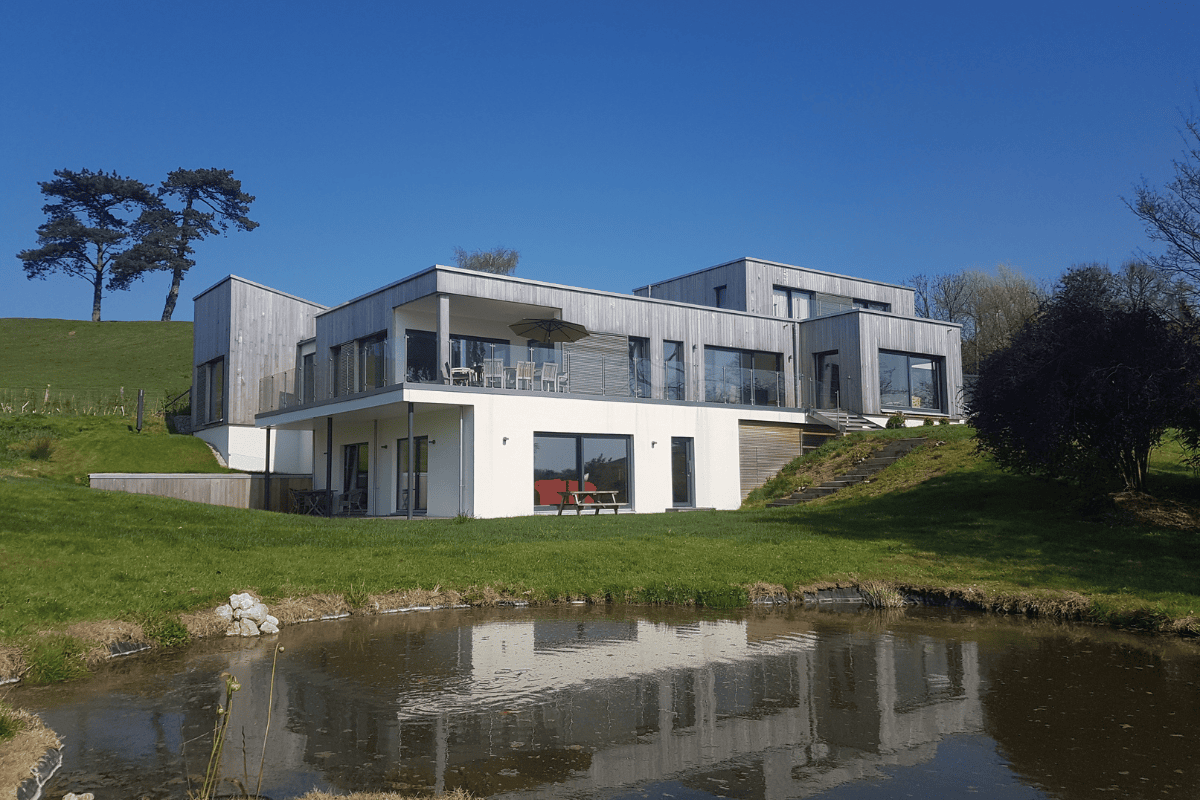
Building your own home is an exciting and rewarding process, offering the chance to create a space tailored to your needs and lifestyle. However, “self-build” doesn’t necessarily mean physically constructing the house yourself. Instead, it involves managing the process, making key decisions, and employing professionals and contractors to carry out the work. One of the biggest advantages of self-build is the ability to design a home that suits your specific requirements, both in terms of aesthetics and functionality. Additionally, you have full control over the energy performance of your home, allowing you to create a low-energy, low-carbon building that is cost-effective to run. This guide walks you through each stage of the process, from feasibility to completion, outlining critical approval processes and timescales to help you navigate your self-build project successfully.
Please bear in mind this is not professional advice, and we would always advise you speak with a suitably qualified person before setting out on this journey
Stage 1: Feasibility and Planning (3-6 months)
Before you begin, it’s important to assess whether your self-build project is viable. Key considerations at this stage include:
- Finding a Suitable Plot: Identify and secure land with appropriate planning permission or potential for approval. Land searches and planning history reviews are essential. You may wish to engage a land agent, and architect or planning consultant to assist with this process.
- Budgeting and Finance: Establish how much you can afford and explore funding options such as self-build mortgages. A financial advisor with experience in self-build projects can help you explore borrowing options and budget planning.
- Design Feasibility: Engage an architect or designer to create initial concept sketches and assess site constraints, such as ground conditions, access, and services. If the site has challenging terrain or poor ground conditions, a structural engineer may need to be consulted early on.
- Pre-application Advice: Consult with the local planning authority to discuss your proposal and identify any planning challenges early on. An architect or planning consultant can be invaluable in navigating complex planning policies and ensuring your application has the best chance of success.
Stage 2: Planning Permission & Design Development (3-6 months)
Once feasibility is confirmed, you need to submit a planning application. Your architect or planning consultant will assist in preparing and submitting the necessary documents.
- Detailed Design & Drawings: Your architect will develop designs, ensuring compliance with local policies and regulations. This stage is an opportunity to refine the layout, aesthetics, and energy efficiency measures, ensuring the home meets your personal preferences and long-term sustainability goals. You can work with an architect and/or energy consultant to optimise insulation, airtightness, and heating systems to achieve a low-energy home.
- Planning Application Submission: A standard planning application takes approximately 8-13 weeks for a decision.
- Consultation Process: Local authorities will consult with neighbours, highways, and other relevant bodies.
- Planning Conditions: Approval may be subject to conditions requiring additional information before work begins.
Key Approvals:
- Full Planning Permission: Required for most new dwellings unless permitted development rights apply.
- Listed Building Consent: If applicable, for sites involving historic structures.
Stage 3: Technical Design & Building Regulations Approval (2-4 months)
With planning permission secured, the next step is obtaining Building Regulations approval to ensure compliance with safety, energy efficiency, and accessibility standards.
- Technical Drawings & Structural Calculations: Developed by your architect and structural engineer. A sustainability consultant can be engaged at this stage to enhance the energy performance of the building.
- Building Regulations Application: Submitted to either the local authority or an approved inspector.
- Party Wall Agreements: If your project affects shared boundaries, you may need to serve notice under the Party Wall Act 1996. A party wall surveyor can handle this process.
- CDM Regulations & Principal Designer Role: Under the Construction (Design and Management) Regulations 2015 (CDM 2015), a Principal Designer must be appointed to oversee health and safety during the pre-construction phase.
- Energy Efficiency Considerations: This stage provides an opportunity to enhance the sustainability of your home by incorporating high-performance insulation, renewable energy sources, and energy-efficient heating systems, helping to reduce carbon emissions and running costs.
Key Approvals:
- Building Regulations Approval: To be obtained via a Full Plans Application
- Structural Warranty: Required by most lenders and obtained through providers like NHBC, LABC Warranty, or similar.
Stage 4: Pre-Construction & Procurement (2-4 months)
Before breaking ground, you must finalise contracts and appoint a construction team. This stage involves:
- Choosing a Construction Route: Options include hiring a main contractor, managing subcontractors yourself, or using a package home provider.
- Tendering & Contractor Selection: Obtain quotes and select your preferred contractor(s) based on cost, experience, and references.
- Contracts & Insurance: Establish clear contractual agreements and ensure adequate self-build insurance and site liability coverage.
- Utilities & Services Arrangements: Plan connections for water, electricity, drainage, and broadband.
- Health & Safety: Under CDM 2015, a Principal Contractor must be appointed to manage site safety during construction.
Key Approvals:
- Construction Contract: Formal agreement with a contractor to outline scope, costs, and timelines.
- CDM Notification: For projects exceeding 30 working days or 500 person-days, a notification must be submitted to the Health and Safety Executive.
Stage 5: Construction (6-18 months)
This is the most intensive phase, requiring effective management to keep the project on schedule and within budget. The main stages include:
- Groundworks & Foundations: Site preparation, excavation, and foundation pouring. A geotechnical engineer may be needed for complex ground conditions.
- Superstructure: Construction of the walls, floors, and roof.
- First Fix: Installation of plumbing, electrics, heating, and internal structural elements.
- Weatherproofing: Ensuring the building is watertight with roofing, windows, and doors installed.
- Second Fix: Finishing touches, including plastering, internal joinery, tiling, and final electrics.
- Final Finishes: Painting, flooring, kitchens, and bathrooms.
- Sustainability Measures: By incorporating energy-efficient building materials, solar panels, and heat recovery systems, you can significantly lower your home’s carbon footprint and future energy costs.
Regular site inspections will be required to ensure compliance with Building Regulations, particularly at key stages such as foundation completion, structural framework, and final completion.
Key Approvals:
- Building Control Inspections: Carried out by your local authority or approved inspector.
Stage 6: Completion & Handover (1-2 months)
As construction nears completion, a series of final approvals and certifications must be secured.
- Snagging & Defect Rectification: Identify and rectify minor issues before sign-off.
- Final Building Control Inspection: Ensures all work meets regulations before a completion certificate is issued.
- Energy Performance Certificate (EPC): Required for all new homes before they can be occupied.
- Final Utility Connections: Ensure all services are fully operational.
- Handover & Moving In: Once approvals are complete, you can officially move into your new home.
Key Approvals:
- Building Control Completion Certificate: Confirms compliance with regulations.
- Structural Warranty Certificate: Required for mortgage purposes and long-term protection.
A self-build project is a complex but immensely rewarding undertaking. Understanding each stage—from feasibility to completion—will help you stay on track, meet legal requirements, and ultimately achieve a high-quality home tailored to your vision. By designing a home that meets your exact needs and incorporating energy-efficient features, you can create a comfortable, low-carbon, and cost-effective house to run. Surrounding yourself with the right professionals, including an architect, structural engineer, sustainability consultant, and contractors, will ensure a smoother process. By planning carefully and keeping on top of approvals, you’ll be well on your way to enjoying your dream home. We would love to talk to you about becoming part of the process to turn your dream into reality. You can get in touch here.
Planning Applications In Areas With Housing Shortfalls
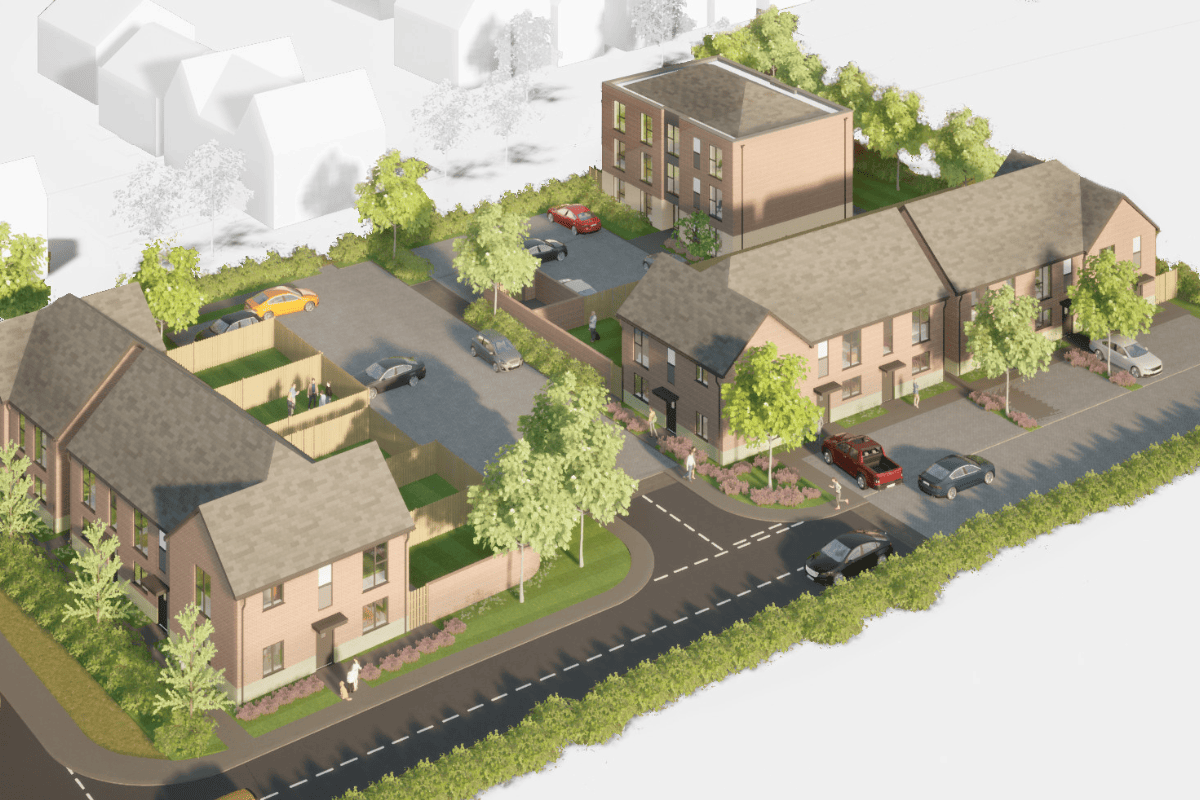
Thinking Buildings have recently been commissioned to assist with developing a planning application for a residential site which is outside, but on the edge of, a village settlement boundary. Ordinarily, this would be sufficient to deter most from submitting an application, but with increasing pressure to build more houses, the balance is tilting in favour of development.
For developers, landowners, and self-builders, submitting a planning application in an area where the local authority is failing to meet its housing targets can present a unique opportunity. The UK’s planning system places a statutory duty on councils to demonstrate a five-year housing land supply. If they cannot, national planning policy tilts the balance in favour of sustainable development, significantly increasing the chances of gaining planning permission.
The National Planning Policy Framework (NPPF) states that if a local authority cannot demonstrate a five-year supply of deliverable housing land, the “presumption in favour of sustainable development” applies. This means that planning applications for new housing should generally be approved unless the adverse impacts of the proposal significantly and demonstrably outweigh the benefits.
This policy shift is crucial because it weakens a council’s ability to reject applications based on restrictive local policies alone. Instead, decision-makers must assess proposals against the broader objectives of national planning policy, which prioritises boosting housing supply.
In areas with a housing shortfall, councils may be forced to consider development on sites not previously earmarked in their Local Plan. This provides opportunities for landowners and developers to bring forward well-designed, sustainable proposals in locations that might have previously faced resistance.
This is particularly relevant for edge-of-settlement sites, brownfield land, and infill plots, which may become more viable when councils struggle to meet targets. Additionally, rural exception sites – small developments on the edges of villages – may stand a better chance of approval if they contribute to addressing the housing shortfall.
When a local authority is under pressure to boost housing supply, planners may be more inclined to work proactively with applicants to approve sustainable developments. Councils want to avoid costly and time-consuming appeals, particularly if they are likely to lose due to a lack of housing supply.
If an application is refused, the absence of a five-year housing supply can significantly strengthen an applicant’s case at appeal. Planning inspectors will consider whether the council has a demonstrable housing shortfall, and if so, the presumption in favour of sustainable development will weigh heavily in the applicant’s favour. Many appeals in such circumstances result in approvals, further encouraging developers to submit applications.
While the policy creates opportunities for developers, it also benefits local communities by helping to address housing shortages, improve affordability, and support economic growth. Thoughtfully designed schemes that incorporate sustainability measures, good design principles, and appropriate infrastructure contributions are more likely to gain support from both planners and local stakeholders.
Submitting a planning application in an area where the local authority is failing to meet its housing targets can be a strategic move. With the presumption in favour of sustainable development, greater flexibility in site selection, and increased chances of appeal success, developers and landowners can take advantage of a planning system that actively seeks to address the UK’s housing crisis.
Do reach out if you’d like to know more or have a potential site. We offer free initial assessments, you can arrange to talk to us here.
Just Building One House? You Still Need To Know About CIL!

The Community Infrastructure Levy (CIL) is a development tax introduced in England and Wales in 2010 to support local authorities in funding the necessary infrastructure for new developments in their areas. Local governments can impose this charge on most types of new development, allowing them to secure funds for essential services that will benefit the growing population. The CIL has been a significant tool in ensuring that local communities can maintain their quality of life and access to resources, even as new residential, commercial, and industrial projects are established.
Purpose and Rationale
The CIL was created to provide a fair, transparent, and predictable way to fund infrastructure improvements that meet the demands of increased development. The primary purpose of the CIL is to make sure that local communities can benefit from, and sustain, the influx of people, businesses, and services associated with growth in the area. Infrastructure is crucial to supporting both local economies and community well-being. Roads, schools, healthcare facilities, parks, and other public resources are essential for thriving communities, and as new developments are established, they put additional strain on these resources.
Unlike the previous approach, which primarily relied on Section 106 agreements, the CIL provides a more straightforward, upfront charge that developers pay based on the size and type of their projects. Section 106 agreements are still in use but are typically reserved for site-specific obligations rather than wider infrastructure funding. The CIL provides a clearer path for local governments to gather resources, enabling them to budget and allocate funds for key infrastructure projects that serve the community as a whole.
Scope and Applicability
The CIL applies to most new developments that create additional floor space of 100 square meters or more. In the case of new dwellings, however, the levy is applied regardless of the size, ensuring that all housing developments contribute to the local infrastructure. The charge generally applies to both residential and non-residential developments, including commercial and industrial projects, although there are exceptions and reliefs available (which will be discussed later).
The CIL charge is levied at the planning stage, meaning developers are aware of the costs before they commence work. This transparency helps developers make informed financial decisions and allows local councils to project how much revenue they can expect from developments in their jurisdiction.
Calculating the CIL Charge
One of the distinctive aspects of the CIL is that it is calculated based on a “charging schedule” set by each local authority, which considers the infrastructure needs and development patterns within its boundaries. The rate of the CIL varies between different areas and often between types of development within the same area. For instance, high-demand residential areas may have higher rates compared to low-demand areas, and commercial or retail developments might be charged at different rates than industrial or office spaces.
Local authorities determine CIL rates on a per-square-meter basis, so larger developments naturally incur higher charges. This square meter calculation allows the levy to scale with the size of the development, ensuring that those which will place the greatest demand on infrastructure contribute proportionately. Each authority’s charging schedule is subject to public consultation and examination by an independent examiner before it can be adopted. This process is meant to ensure fairness and that the rates are set in accordance with local economic viability, balancing the need for infrastructure funding with developers’ capacity to pay.
It should be noted that in Greater London developers may be obliged to pay Mayoral CIL and also any CIL levied by the London Borough in which the development is proposed.
Exemptions and Reliefs
Although the CIL is broadly applied to new developments, there are specific exemptions and reliefs designed to encourage certain types of development or to reduce the financial burden on particular projects. These exemptions and reliefs help ensure that the levy does not unintentionally discourage developments that may be beneficial to the community.
1. Minor Developments: Generally, developments under 100 square meters that do not create a new dwelling are exempt from the CIL. This exemption is intended to relieve small projects, which may not significantly impact infrastructure demands.
2. Self-Build Homes: Self-build projects are often granted relief from the CIL. This includes homes built by individuals for their personal use, as well as residential annexes and extensions. Self-build exemptions help support individual home builders and allow for small-scale, personal projects without the additional burden of CIL costs.
3. Charitable Developments: Charities developing property for charitable purposes may also qualify for exemptions. This provision helps charities maximize the benefits of their investments in local communities, particularly in cases where they are developing facilities like community centers, affordable housing, or other projects with direct public benefit.
4. Affordable Housing: Projects that provide affordable housing are typically exempt from the CIL, in line with government goals to address housing affordability and support vulnerable groups. This exemption supports the creation of low-cost housing options, which are essential to meeting the needs of the community without increasing the cost burden on the developers.
Use of CIL Funds
The funds collected through the CIL are allocated to infrastructure projects within the local area, supporting development in ways that benefit the community directly. Local authorities are required to publish an “Infrastructure Funding Statement” each year, which outlines how they plan to use the CIL revenue and provides transparency around infrastructure priorities. The types of infrastructure that can be funded through the CIL are varied, and local councils are given discretion to address their specific needs. Common uses of CIL funds include:
1. Transport Networks: Improving roads, bridges, public transit systems, and other aspects of the transportation network is a frequent priority. Effective transportation infrastructure supports local economies and helps prevent congestion issues that can arise from increased development.
2. Educational Facilities: With more residents comes the need for expanded educational facilities. CIL funds can be used to build new schools, expand existing ones, or provide additional resources that support a growing student population.
3. Healthcare Services: Growing communities require expanded healthcare services, from clinics and hospitals to mental health facilities. CIL revenue can help fund these essential services, ensuring that residents have access to adequate healthcare.
4. Parks and Public Spaces: Parks, recreation areas, and other public spaces are integral to community well-being. CIL funds allow local authorities to create or enhance these spaces, providing areas for relaxation, exercise, and community events.
5. Flood Defenses and Environmental Protections: In areas where development may increase flood risks or impact local ecosystems, CIL funds can be directed toward flood defense projects, drainage systems, and other environmental protections.
Benefits and Limitations of the CIL
The Community Infrastructure Levy has proven to be an effective way to ensure that new developments contribute to the wider community by supporting necessary infrastructure. The transparency of the CIL process—where developers know the charge from the outset—provides a level of predictability that was lacking under the previous reliance on Section 106 agreements. Additionally, because the CIL is applied to almost all types of development, it provides a more equitable system where every new project contributes to the community’s infrastructure needs.
However, there are some limitations to the CIL. Not all local authorities have adopted the levy, often due to challenges in determining appropriate rates or because they prefer using Section 106 agreements for specific projects. Additionally, while the CIL provides essential funds, it is rarely enough to cover all infrastructure needs, meaning local authorities must often seek additional funding sources. The flexibility to set local rates can also create discrepancies between neighboring areas, with some regions potentially setting rates too low to cover their infrastructure needs or too high, discouraging development.
Conclusion
In summary, the Community Infrastructure Levy is a tool for local authorities in England and Wales, enabling them to raise funds to support infrastructure improvements and meet the demands of growing populations. By charging developers based on the size and type of their projects, the CIL ensures that new developments contribute to the community resources they depend on.
From 2010 to 2017, 138 local authorities in England and Wales had adopted the Community Infrastructure Levy (CIL), while nearly 230 had published draft charging schedules for consultation. The Planning Resource website maintains a “CIL Watch” map and database, offering up-to-date information on local authorities’ CIL adoption status.
What Our Clients Need To Know About The Building Safety Act

The Building Safety Act 2022 represents one of the most significant overhauls of construction regulations in recent memory, introducing stricter rules to enhance safety standards across the built environment. If you’re planning a building project, you may have come across the role of the Principal Designer, a term that might sound familiar from the Construction (Design and Management) Regulations 2015 (CDM 2015). But what’s new with the Principal Designer under the Building Safety Act, and what does it mean for you as a client? In this article, we’ll break down what you need to know.
The Origins: Principal Designer in the CDM Regulations
Under the CDM Regulations 2015, the role of the Principal Designer was created to oversee and manage health and safety in the pre-construction phase of a project. Their responsibilities include identifying and managing risks related to the design, ensuring these risks are communicated clearly to the project team, and advising clients on their legal duties regarding health and safety.
For most clients, appointing a Principal Designer under CDM is a requirement when your project involves more than one contractor. This can apply to anything from small domestic renovations to large commercial developments.
What’s New Under the Building Safety Act?
While the Principal Designer role under CDM remains largely focused on pre-construction, the Building Safety Act introduces changes for all projects, but significant changes for certain types of projects, particularly those involving high-risk buildings (HRBs), such as high-rise residential structures over 18 metres tall.
The Principal Designer’s responsibilities under the Building Safety Act go beyond the design phase to include accountability throughout the lifecycle of a building, from design and construction to future maintenance and use. This means that for higher-risk projects, the Principal Designer plays a more comprehensive role, working alongside the new Building Safety Regulator (BSR) to ensure safety standards are maintained not just during construction, but throughout the building’s occupation.
Key Differences
1. Scope of Responsibility
Under the Building Safety Act, the Principal Designer must ensure that the building can be safely managed throughout its life. This includes compiling and maintaining a “Golden Thread” of information – a complete record of the building’s design, materials, and safety considerations, which will be used throughout its lifecycle.
2. Accountability in High-Risk Buildings
For HRBs, the Principal Designer is legally responsible for coordinating safety measures during the design, ensuring they are built into the fabric of the building itself. This responsibility extends well beyond what was required under CDM, where the Principal Designer’s duties ended with the design phase.
3. Collaboration with the Building Safety Regulator
The Building Safety Act introduces the Building Safety Regulator (BSR), a new authority responsible for overseeing safety in high-rise residential buildings. The Principal Designer must work closely with the BSR, ensuring compliance with safety protocols throughout the design and build phases.
What Does This Mean for Clients?
As a client, it’s crucial to understand your role in appointing a Principal Designer and the implications if you don’t comply. Here are the key takeaways:
1. You Must Appoint a Principal Designer
Just as under CDM, you are legally required to appoint a Principal Designer if your project involves more than one contractor. For HRBs, this role becomes even more critical, as the Principal Designer’s duties now extend far beyond the construction phase. Appointing a qualified and experienced Principal Designer early on is key to ensuring the project meets all regulatory requirements.
2. Ensure the Principal Designer is Qualified
The Principal Designer must have the relevant skills, knowledge, and experience to manage health and safety effectively. This is particularly important for high-risk buildings, where the consequences of poor safety management can be severe. Make sure you appoint someone with experience in similar projects and who understands the additional requirements under the Building Safety Act.
3. Failure to Appoint a Principal Designer Has Consequences
Failing to appoint a Principal Designer when required can have serious consequences, ranging from fines and enforcement notices from the Health and Safety Executive (HSE) to potential legal action in the case of serious safety breaches. For high-rise residential projects, non-compliance could also delay the handover of the building, leading to costly project overruns.
Who Can Be a Principal Designer?
The role of Principal Designer can be filled by any individual or organisation that possesses the appropriate skills, experience, and qualifications to manage design-related safety risks. Commonly, the following professionals or firms may be appointed:
– Architects or architectural firms
– Engineering firms
– Surveyors
– Design consultants
What’s important is that the person or organisation appointed must have experience managing safety in projects of similar scope and complexity. They must also be familiar with the specific safety requirements of the project, particularly if it falls under the Building Safety Act’s definition of a high-risk building.
What Happens If a Client Doesn’t Appoint a Principal Designer?
The consequences of failing to appoint a Principal Designer can be significant. Under both CDM and the Building Safety Act, this is a legal requirement. Here’s what can happen if you don’t:
1. Fines and Enforcement Action
The Health and Safety Executive (HSE) is responsible for enforcing CDM compliance. If you don’t appoint a Principal Designer, the HSE can issue fines, enforcement notices, or even halt your project until you comply. For HRBs, the penalties could be even more severe, including criminal prosecution in extreme cases of negligence.
2. Project Delays and Increased Costs
Without a Principal Designer, your project could face significant delays. Health and safety risks might not be identified early enough, leading to costly changes during construction. You might also have to rework large parts of the design to meet compliance, further increasing costs and timelines.
3. Increased Safety Risks
Without a dedicated professional managing safety from the design stage, there’s a higher likelihood of accidents during construction, putting workers at risk. Poorly managed safety risks can also affect the long-term safety of the building, leading to potential legal claims or expensive rectification work later on.
Conclusion
The Principal Designer role under the Building Safety Act builds on the existing framework of CDM regulations, adding a much stronger emphasis on accountability and long-term safety for high-risk buildings. For clients, this means a greater need for due diligence when appointing a Principal Designer, ensuring that they are qualified and capable of managing not only the design risks but also the long-term safety of the building.
Failing to appoint a Principal Designer or not complying with the regulations can result in severe penalties, project delays, and increased risks. By engaging with the process early and appointing a competent Principal Designer, you can ensure your project meets all legal requirements and delivers a safe, compliant building for the future.
Further Reading
Here are three useful links for further reading on the Building Safety Act and the role of the Principal Designer:
1. UK Government: Building Safety Act Overview
(https://www.gov.uk/government/collections/building-safety-bill)
A comprehensive overview of the Building Safety Act 2022, including details about the legislation’s key changes and how it affects construction projects and high-risk buildings.
2. Health and Safety Executive (HSE): CDM 2015 Regulations
(https://www.hse.gov.uk/construction/cdm/2015/index.htm)
Detailed guidance on the Construction (Design and Management) Regulations 2015 (CDM 2015), explaining the legal duties of clients, designers, and contractors, including the role of the Principal Designer.
Building Your Dream Home In The Countryside
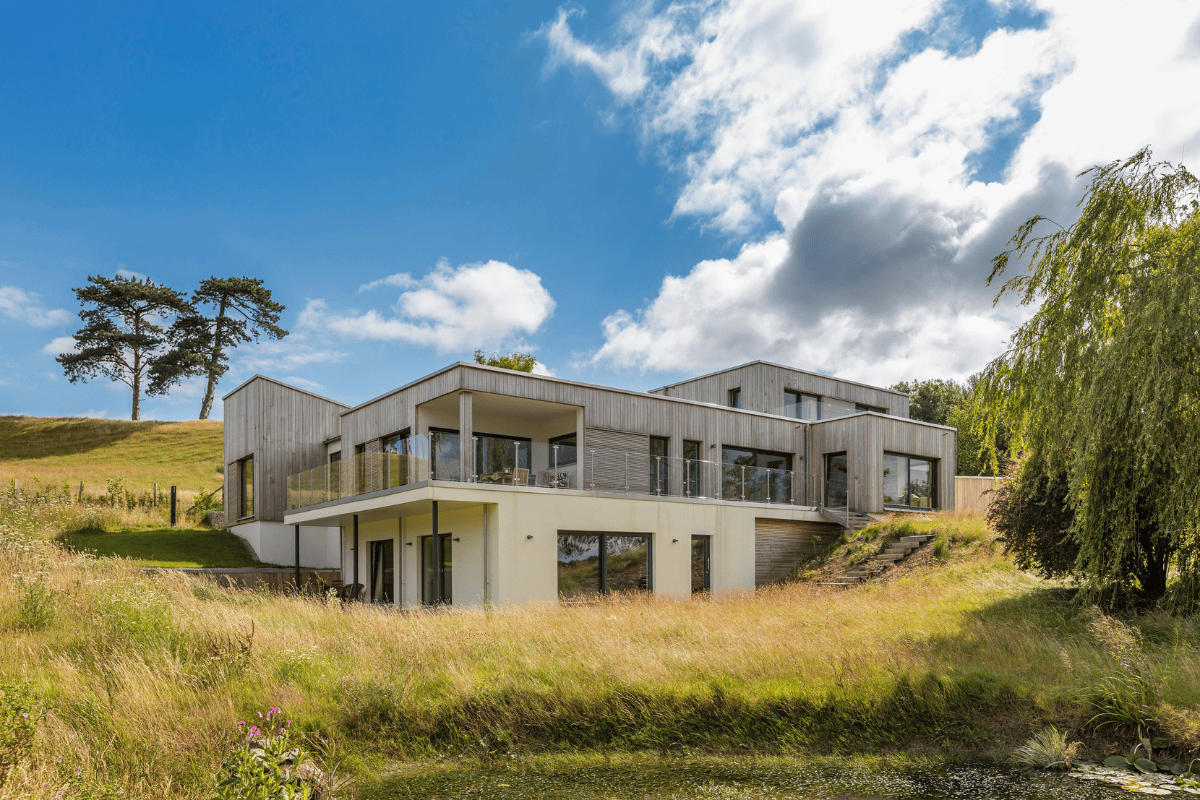
For many, the idea of building a new home in the countryside is a dream that seems out of reach. However, the little known Paragraph 84 of the National Planning Policy Framework (NPFF) offers a possibility that few might have considered achievable. This provision allows for the construction of new isolated homes in the countryside under special circumstances, offering an exception to the usual restrictions on rural development.
What is Paragraph 84?
In contrast to the general policies that restrict new residential development in rural areas, Paragraph 84 of the NPPF allows new homes to be built in the countryside if they are of exceptional design quality. This policy was developed in response to the recognition that new housing, particularly in rural areas, often lacks creativity, uniqueness, and environmental sensitivity.
Under criterion (e) of Paragraph 84, isolated homes may be permitted if they meet the following requirements:
- Truly outstanding design: The home must reflect the highest architectural standards and help elevate design quality across rural areas.
- Enhance its immediate setting: The house should significantly improve its surrounding landscape and be sensitive to the local area’s defining characteristics.
A Legacy of Exceptional Design in the Countryside
The policy allowing for isolated homes of exceptional quality has a rich history, dating back to 1997 when Environment Secretary John Gummer introduced the concept under Planning Policy Guidance 7 (PPG7). Known as “Gummer’s Law,” it aimed to continue the English tradition of building country houses that enhance the rural landscape.
Over the years, this policy has evolved, but remains focused on ensuring that only homes with outstanding design or innovative qualities are approved for construction in the countryside. The policy’s latest form, now found in Paragraph 84 of the NPPF, retains the core requirement: new rural homes must significantly contribute to their surroundings through thoughtful architecture and environmental sensitivity.
From PPG7 to Paragraph 84: A Policy Evolution
While the policy has seen several iterations, including PPS7 in 2004 and NPPF Paragraph 55 in 2012, the essence has remained the same. Each update has retained the special provision for isolated homes of exceptional quality, though some of the more stringent requirements, such as “ground-breaking” design or only “very occasional” approvals, have been relaxed.
Today, Paragraph 84 simplifies these requirements, making it clear that the design can either be truly outstanding or innovative but does not need to be both. This shift has made it easier for unique and exceptional homes to gain approval, while still maintaining a high bar for architectural and environmental excellence.
Achieving a Paragraph 84 House
Thinking Buildings have extensive experience with planning applications in many parts of the country, including areas within the Green Belt, Areas of Outstanding Natural Beauty and National Parks.
Before setting out on a Paragraph 84 application it’s vital to undertake a development appraisal taking into account paragraph 84, but also the local planning policies. We have formed strong relationships with other consultants who will be needed to support the process and give the best possible chance of success. These types of application should not be taken on lightly and should be supported by a thorough and robust process.
The opportunity is there for those who aspire and are willing to meet the challenge of exceptional design. Could this be your chance?
We’d be delighted to discuss your ideas and give you free initial feedback.
Examples of some of our previous projects can be seen here: https://thinking-buildings.co.uk/houses-homes/projects/
The Right Time for Heat Pumps?

The Passivhaus Trust have recently released best practice guidance on ‘The right time for heat pumps: decarbonising home heating in a staged retrofit’. Their document discusses the how and when to make the switch from gas boilers to heat pumps in order to avoid unintended consequences, such as increased running costs or a reduction in thermal comfort.
Following on from our previous article on ‘Heat Pumps: Is this the future of home heating in the UK?’ we wanted to explore why decarbonising the national grid is important, when it is best to install a heat pump, and how to get the best efficiency from it.
Why is decarbonising the National Grid important?
Heating buildings accounts for 23% of the UKs carbon emissions. One way to reduce carbon emissions is by making everything electric and relying on decarbonisation of the National Grid instead. Switching to heat pumps could make this a viable option.
However, to achieve the 2035 decarbonisation target, the amount of electricity generated and connected to the network would have to treble to meet the current demand. Therefore, to achieve a net zero grid, both an increased uptake in heat pumps and energy efficiency improvements will be required to existing houses. Both these things will reduce the consumer heat demand and also the total peak load on the grid.
As well as incorporating a heat pump, the best way to improve energy efficiency in existing buildings is to improve the building fabric. This will help reduce:
- operational cost of the heat pump.
- the size of the heat emitter (radiators) and heat pump reducing capital cost.
- Peak demand on the grid.
When is it best to install a heat pump?
The cost to improve building fabric and install a heat pump can be expensive to do all at once. A staged approach can make this more manageable such as ‘Step-by-step EnerPHit’ or ‘AECB CarbonLite Retrofit’. But at what stage is it best to install a heat pump – before, during or after improvements to the building fabric? The Passivhaus Trust have compared the running costs of a heat pump at different fabric performances using their PHPP software to answer this question. Refer to the Passivhaus Trust’s ‘The right time for heat pumps: decarbonising home heating in a staged retrofit’ for the full results.
The running costs of a heat pump will be higher than a gas boiler if no fabric improvements are made. By installing cavity wall and loft insulation, and replacing double glazing, this can help reduce running costs to the same level as a gas boiler. A key aspect when comparing the running costs of a heat pump is that electricity is currently 4 times the cost of gas.
The Passivhaus Trust have concluded the following staged retrofit approach when thinking about installing a heat pump:
- Installation of insulation which removes the need to upgrade radiators and a smaller heat pump is required. These works are required for heat pump subsidies.
- Improve the airtightness and ventilation to ensure good thermal comfort and air quality.
- Install a heat pump, and may also need replacement radiators and hot water cylinder.
- Replace windows, floors, and install additional wall insulation.
How to get the best efficiency from a heat pump?
Heat pumps use energy to raise the temperature of a refrigerant from the outdoor air temperature to that required by the heating system. How long the heating is on for can be really important. For example, you could heat a house to 20 degrees with the heating on for a third of the time or you could keep the house at 20 degrees by heating continuously and the heat pump would actually use less electricity (over an annual period). This is because heat pumps are most efficient when supplying heat at low temperatures. Running a heat pump continuously but with a low radiator temperature is more efficient, but the downside is, this increases the overall heating demand. This means that by running it continuously you lose more heat but generate it more efficiently.
In light refurbishment scenarios the air source heat pump (ASHP) comes out more expensive when run intermittently. This is because higher flow temperatures are required to heat over a shorter time ie. The coefficient of performance (COP) of the heat pump reduces. An effective method with conventional heating to reduce running costs is by limiting the time it’s on. This doesn’t work with ASHP and will in fact increase running costs if heating at the same room temperature. An important issue is also the variation of the COP with external temperature . A gas boiler will give you the same heat output for a given cost but a heat pump in colder weather will give you significantly less heat output than in warm weather.
So are heat pumps the future?
Changing from gas boilers to heat pumps will reduce carbon emissions, and combined with fabric improvements, will reduce energy demand and running costs. Heat pumps do work in uninsulated buildings but it is harder to get the running costs at a level equivalent to or better than gas. There would need to be a shift in the way we heat our buildings, as occupants intermittently heating their homes mean that a heat pump will work less efficiently leading to higher running costs and lower temperatures. The recommendation is to make fabric improvements, such as mechanical ventilation with heat recovery (MVHR) cavity/ loft insulation, and airtightness measures prior to having a heat pump installed. Taking all this into account, heat pumps will work effectively in conjunction with building fabric improvements and continuous heating.
If you would like any further information, we have a dedicated low energy section on our website, as well as Rachel, our an inhouse certified Passivhaus designer, who wrote this article. We would be happy to discuss more with you about your next project, do get in touch if we can help you.
Integrated Photo Voltaic Panels
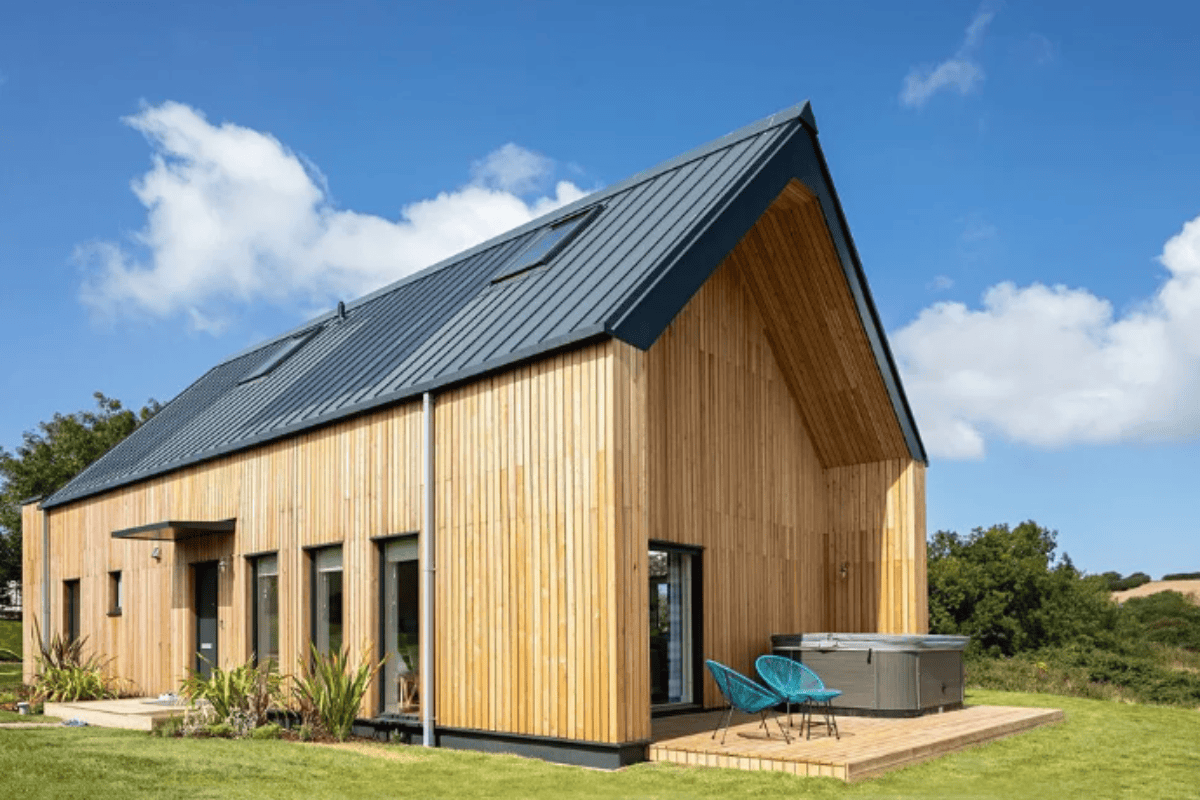
Here’s an interesting idea. Building integrated Photo Voltaic panels. What’s that I hear you ask?
When it comes to fixing solar panels to a roof, it’s all about making sure they stay put, while also being mindful of the roof’s structure.
For sloped roofs, which are the most common, roof hooks or brackets are securely attached to the roof’s rafters or trusses. These are like strong metal anchors that provide a stable base for the solar panel mounting system. They’re usually fixed using bolts or screws that penetrate the roof’s surface and are sealed to prevent leaks. Once the mounting structure is securely in place, the next step is to install the rail system. This involves laying out rails or frames onto which the solar panels will be mounted. These rails are attached to the roof hooks or brackets for sloped roofs. With the rail system installed, the solar panels can then be mounted onto it using clamps or brackets.
This results in the panels sitting above the roof finish which can be unsightly. But what if there is another way……
A new system by Catnic offers a different route. A metal standing seam roof with bonded solar panels delivers an efficient and effective roofing system that performs just as well as it looks. Unlike traditionally mounted solar PV systems, Catnic SolarSeam is bonded to the roof panel, offsite, creating a low-profile and seamless finish that’s guaranteed to produce energy for 25 years.
The system uses CIGS technology (Copper Indium Gallium Selenide), thin-film solar cells to convert sunlight to energy which is ideally suited to the UK climate. This single solution saves on materials, installation, and maintenance when compared to a traditional system.
Could this be right for your project? Get in touch if we can assist you.
Low and zero carbon technologies – what does this mean and what are the options?

Carbon-neutral and Net-zero Carbon are two similar terms. In both cases, parties are working to reduce and balance of their carbon footprint. However, Carbon-neutral refers to balancing out the total amount of carbon emissions, while Net-zero Carbon means no Carbon emission from any activity. Most of the industries and governments become Carbon neutral through the purchase of Carbon credits. While Carbon removal is only a long-term solution, implementing technological improvements/ innovations plays a major near-term role in achieving Net-zero Carbon.
According to the 2022 UK greenhouse gas emissions report issued by the Department for Energy Security & Net Zero identifies; Transport (112.5 MtCO 2 ), Energy supply (82.2 MtCO 2 ), Business (61.9 MtCO 2 ) and residential (56.4 MtCO 2 ) as the largest Cabon emission sectors.
When it comes to buildings (for both businesses and residential), the reduction of Carbon emission needs to be targeted for embedded Carbon and Operational Carbon.
Embedded Carbon includes all the Carbon emitted in material (used for building construction) production. Actions are then required to reduce Carbon from raw materials and in production stages:
1. Increasing the recycled content of the final material.
2. Reducing energy demand for material processing e.g. Improving the total system efficiency by using highly efficient machinery and optimizing the production layout/procedure.
Greater energy efficiency and use of renewable sources play a major technical role in the efforts for decarbonisation at the operational stage as it includes Carbon emitted during the whole life of a building. Options to reduce this energy usage include:
1. Design efficient and optimised building systems by following guidelines such as Chartered Institute of Building Services Engineering (CIBSE), American Society of Heating, Refrigeration and Air-Conditioning Engineers (ASHRAE) or London Energy Transformation Initiative (LETI).
2. Use of LED lighting.
3. Purchasing of equipment with higher energy efficiency ratings (e.g.: Energy Star Rating)
4. Envelope improvement: Installation of thermal insulation (e.g.: Mineral wool, fibreglass, etc.) with adequate thickness and use of double-glazed windows will help keep the heat inside the building. This in turn will reduce heat loss from the building and will reduce the energy requirement for heating.
5. Improve the efficiency of the heating, cooling and ventilation systems
a. Air Source Heat Pumps (ASHPs): ASHPs absorb heat from ambient air and generate hot water which then either be transferred directly to radiators or to a hot water cylinder. The average heating efficiency of an ASHP, determined by the coefficient of performance (COP), is around 2.8.
b. Variable Refrigerant Flow (VRF) Systems: Commonly used to provide heating (and/or cooling) for multi-story buildings with high heating/cooling requirements. VRF systems absorb the heat from ambient air and transfer it into the building via refrigerant. The efficiency ranges mainly between 2.9-4.4.
c. Heat Recovery Ventilation (HRV): This system is used for buildings that require both exhaust and fresh air supply. The HRV unit recovers the residual heat from the exhaust gas to pre-heat (or pre-cool) the fresh air intake. This helps reduce the heating/cooling requirements while in some cases can manage the space temperature on its own.
6. Photovoltaic (PV) Solar Panels are commonly associated with buildings due to the convenience of installation. PV panels are increasingly more efficient at converting the sun’s rays into electrical energy and are best located on the building roof to avoid shading from surrounding buildings. There is no guarantee that the excess power can be sold back to the utility provider so the PV capacity should be designed for supplying base load or Lithium-ion batteries could be an option.
Using a single measure (mostly by the installation of solar PV) or a combination of the above technologies a building can reach low or zero Carbon status. However, it is best to carry out either an energy audit or an energy simulation to identify the cost-effective method for a building to meet its Carbon reduction targets.
News article prepared by BEM Services – See https://www.bem-services.co.uk/ for more information.